Sunday 29 November 2015

Gorgeous journal cover with Pebeo Crackle modelling paste

Cover a journal cover in crackle modelling paste

Hello everyone! Today as we approach the end of the year I have created a great project that will result in the most unique Christmas gift. I have decorated journals for many years and I can tell you that everyone who receives one of these journals treasures them and just loves them to bits!

Here's my snapguide on the steps required to produce such a lovely distressed journal cover.


Saturday 28 November 2015

Pebeo Fantasy Phone Covers with Michelle

Do you have a heap of old phone cases lying around that have seen better days??
Why not give them a new lease of life with some Pebeo Fantasy Prisme & Moon Paints as well as some Vitrail Paints and Cerne Relief Outliners. These are super easy to make, you you need to do is pour and use a toothpick to create some patterns.

Some tips to working with Fantasy & Vitrail Paints are:
  • Don't overwork/ overblend the colours. adding the colours side by side and letting them do their own dance creates the most spectacular results.
  • Don't work directly under a fan with these paints, a fan will develop a dryer skin on top of the colours that doesn't work as well when dragging patterns through the colours.
  • Leave the colours over your surface for at least 15min to 40min before dragging patterns through it. You want the colours to settle into each other but not dry to much. You still want the colours to be able to move. Waiting before adding patterns holds the pattern shapes a little better.
  • Don't get too attached to the initial pour, they keep working and activating with each other as they dry, that is where the magic happens.
Enjoy this video tutorial on how I created the second cover and how I have used the Cerne Relief Outliner. :)

These are the quick and easy steps to creating the background on the first cover.
These would make awesome Christmas presents that you could personalize with their names.


If you revamp your phone covers we would love to see them over on the Facebook page
https://www.facebook.com/craftycrusaders/


Friday 27 November 2015

Spice up the White - Porcelaine Paints With Pebeo

With a little Pebeo Porcelain Paint you can spice up a white mug this xmas as a personal little handmade gift idea.
I myself am not a fan of white mugs, I had to purchase some just for this tutorial! I collect bright coloured funky mugs! So how does one turn a boring old white mug into something fun and personal!

With alphabet stickers of course! and some various colours of the Pebeo Porclaine paints! I grabbed some cheap alpha stickers from the Reject Shop for $2.00


I did my pet name from my husband and also my initials I grabbed a stippling brush and also my palette, poured some of the colours I wanted to use and started bouncing my round stippling brush onto the mug. Super easy and simple!
I completely clean the mugs to make sure there is no residue on the mugs so the paint has a clean surface to work with.
TIP - Apply the stickers to your clothes first before putting onto the mug to allow some of the stickyness to be muted, so when it comes time to remove your alphabets it wont be such a huge pain.


I did test how the stippled dots would look on a spare piece of card before applying to the mug, to make sure I was happy with how it turned out.
This Blog post is also a lesson for you if you get to the end of your project and you hate it...I remade this cup 5 times before I settled on a design, you will see some of the ok attempts! REMEMBER NOTHING IS SET IN STONE UNTIL YOU BAKE IT!

 I used red and white paint and also mixed the two to make a soft pink, I also used a q-tip to add little red polkadots to the design.
Using a pin I removed the stickers, you may need to use some Methylated spirits to sharpen your edges if you so wish! I used a fine brush with the metho to work the edges.

another way you can add colour, is using sponges and bouncing thin washes of colour to your mug.
I used primary colours and a sponge and pounced the sponge onto the mug to give a softer effect...then I decided I wanted to create a cute watermelon inspired mug so started..yet again.

Using the same sponge technique I bounced red and green onto my mug over my alphabet stickers

once I was happy I then used a black pebeo porcelain paint pen, and drew on little sporadic seeds. The lovely little mug now holds my current fave washii tapes on my desk!

If you create a mug design and you aren't in love with it, a paper towel and methylated spirits will remove your work, and you can start again! just because you failed once doesn't mean you've ruined your mug! Like I said nothing is set in stone unless you've baked it.

Let your creations dry for a full 24 hours before baking.
150 degree oven for 25 mins, I turn the oven off and leave the door open for the mugs to cool.
I hand wash all my handmade things just to be on the safe side!

I hope you enjoyed this little quick fun tutorial, and remember everything can be fixed.
seeya next week.
Courtney Diaz

Wednesday 25 November 2015

a"MAZE"ing mini journal with Canson.


Jingle bells , Jingle bells. 
Journal all the way…


This is a fun way of creating journals . 
Mixing up your style of journals can be as inspiring as what you put in them.


 Create a 'MAZE' journal with just one sheet of Canson 300gsm watercolour paper. Here's a quick look at how to fold and cut  your paper.


Fold sheet in half then fold both 'sides in to the centre creating a "W".

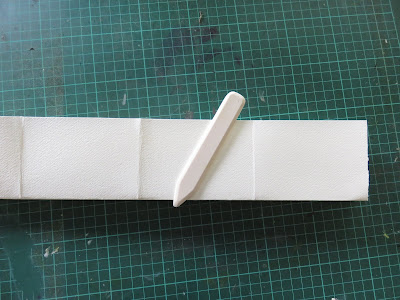
Her you can see the sheet lade out flat. Get a nice crease using a boning tool.

Repeat the process but turning the sheet of paper . Again using a boning tool so score and crease.

Here's your piece folded and with all it's creases.
Now. Looking at this image, you can see that I made cuts on the crease lines. Cut up to the end crease only. creation an "M".

Fold the papers in a concertina like fashion. And there you have it. A new journal. 


With such wonderful family and friends to give gifts to, sometimes thinking outside the box is the way to go . Perhaps creating a "Maze Journal" for one of your loved ones with CANSON watercolour paper and Schmincke Watercolours would make a great personal gift.

Or for those who you know wish to get their creative juices flowing, make a mini maze journal and add some water-colours and a  Printecon Neptune "Quill" brush for the perfect Christmas gift.


 SUPPLIES usedin this project were; a Canson 300GSM Watercolour sheet of paper A3. 
Schmincke Watercolour pallette
A variety of Princeton Quill brushes. 

So with some delicious colour washes and/or sketching and watercolour touches, you've created a wonderful gift or travel journal for personal use. 


With your very own mini fold out journal, a little water and your gorgeous Princeton watercolour brushes, you're ready to escape and create. Or make a special gift for a loved one. 

Schmincke Watercolours 1/2 pans in tin. A variety of Princeton Neptune quill brushes and my Canson watercolour maze journal.


I hope you  have fun with this idea .

Have a wonderful lead up to Christmas and...
Happy creating
xox
Kerry Sinigaglia


Monday 23 November 2015

Tags with Mexpy markers

I grab out some stamps and some cardstock and my son stamped some images.
He then grab the mexpy markers and colored them in.


He know has two cute little handmade tags to give to his mates at school.

He cant wait to make a few christmas ones for his mates.


Felicity XO

Saturday 21 November 2015

Christmas Wreath Card!

Christmas Wreath Card

Made with Mepxy Markers


I may be in denial that Christmas is so soon as there is a lot to do! But truth be told, Christmas is probably my favourite time of year. So I thought making some Christmas themed cards would be the way to go!

These are so simple to make and you can use any Mepxy Markers that you have on hand!


Materials
  • Mepxy Markers:
    • R59
    • W07
    • W29
    • L63
    • L67
    • C99
    • L05
  • Blank Card 
  • Pencil
  • Pentel Gold Brush Pen

I bought a pack of blank cards from a paper store nearby, but you can make them easily enough from any type of paper.


First, I did a rough sketch of the size of the wreath and baubles.


I drew a mix of leaves and berries and continued around the wreath.
I found that turning the drawing helped keep the wreath shape looking like it was following a path around the shape.


Here is the finished product. I added a bow as well for a Christmas-sy touch!


Photograph of the drawing.


First, I started with L05 Elm Green and shaded in the spindly leaves. This helps you see the type of leaves I drew. The pencil also helps stop the bleed of the markers, it fills the shapes really well!
You'll just have to make sure you use paper that is thick enough to not bleed the markers through to the next page. If you are unsure, slip a scrap of paper in the middle so it catches any bleeding.


Here you can particularly see how the markers fill out the shapes really well. Here I used L63 Forrest Green.


Here I added some darker green tones with C99 Pine Needle.


Now I used R59 Cardinal to shade in the berries.


Using my three greens from earlier I filled in the gaps of the wreath and also added some line work to the leaves by shading the stems of the leaves.


Here I used W07 Light Mahogany and W29 Sienna to shade in the ribbon.


You can't see it very well in this scan, but I used my Pentel Gold Brush pen to shade in the baubles. It gives a great effect in real life as it shines when the light catches it. How Christmas-sy!?

You can buy these pens online.


Close up of the gold baubles.


Markers used in this tutorial.


Happy Christmas in advance! The cards are almost too good to give away!


Here's a card I made last year.


~
Find us on Facebook:
Instagram: @mepxymarkers
_________________________
Please send us your work or anything that you create! Thanks for watching!
 
Natalie Wyatt