Psychedelic Eye - Mepxy Marker Drawing
By Natalie Wyatt
 |
| Final Drawing |
|
|
|
|
|
I've been doing a lot of Marker drawings lately and since I have a bit of an obsession with eyes, I thought I would combine the two and do a tutorial on how to layer colour and draw an eye!
When working with the Mepxy Markers, I tend to find success in using the lightest colours and then building up the darker layers on top of that.
You can use any colours that you want, I tend to do something different every time, but today I went for Peacock colours! I will be mentioning which colours I used as the tutorial goes on.
You don't need to use as many as what I did, I was doing workshops this past weekend with using less than 10 colours, but if you have a few at your disposal... then feel free to go crazy!
I also used a sparkly bottle of nail-polish!
Materials:
- Pencil (Use light pencils, HB or H pencils because dark graphite pencils will make your marker drawings look dirty when you use the markers over the top.)
- Mepxy Brush Markers
- Canson A4 Bleed-proof Paper
- Sparkly Nail-polish.
Firstly I started with the outline of the eye. It's a football shape that's turned on an angle.
Add the top eyelid, as well as the tear duct.
Now, to add your iris! I tend to draw the iris and extend it into the eyelid so I can make sure that I've drawn a perfect circle.
Next you add your eyebrow, eyeliner line and waterline.
The tail of the eyeliner and eyebrow may meet.
I also added in guide-lines where I will be adding my shadows.
Excuse the bad scans, I eventually changed to taking photo of the steps.
Here I used CG02 (Cool Grey 2) and filled in most of the eyeball but left a small gap on both sides of the iris, this is the light reflection
Next I added CG03 to add a shadow around the edge of the eyeball.
I then used my W31 (Bridal Skin) and coloured around the edge of the eyeball, eyebrow and eyelid.
Next I used N05 (Sand Storm) and added shadows below and above the eye.
I decided that the eyeball shadow could be darker so I outlined the eyeball again with CG04 (Cool Grey 4)
Next I used M34 (Dark Pink) to colour in the tear-duct and waterline.
Now, pick three colours, a light, medium and dark colour for your iris colour. They don't have to be the same colours, they can be whatever you want, just as long as they gradually become stronger tones.
I used my L25 (Natural green) and filled in the iris. I used circular motions to shade so I achieved an even colour.
Next I used L63 (Forrest Green) and coloured around the edge of the iris, with a thicker line at the top and thinner at the bottom.
Next I used my darkest colour C99 (Pine Needle) to again outline the edge.
You can barely tell from these images, but I used Y06 (Bright Yellow) in a small patch below the pupil to add some brightness.
Next, I went back to my L25 and added some lines on the pupil, following the shape of the circle.
I later decided I could go darker around the iris and used G29 (Pine Green) around the very outer edge of the iris.
Next I used W07 (Light Mahogany) and added details to the tear duct and waterline.
Now for the cool stuff! I drew in a light reflection in the pupil and then filled the colour in with CG09 (Cool Grey 9). This really makes the eye start to come together!
Then I had to decide what colour to use for eyeshadow and once again picked the three colours. B37, C05, B06.
It's like applying make-up! I then used C05 (Cyan) on the eyelid.
I then continued with the same colour, going over the skin tone in a shape like this. ^
I applied B06 (Peacock Blue) to the eyelid at the edges. I used a quick flick to get the sharp lines.
I then repeated with the same colour over the skin tone blue areas.
This started to build the shadows up nicely.
I then used B37 (Indigo) to add more shadows and outlined the eyelid line.
Now for the exciting eyeliner! This really brings it together. I used CG09 (Cool Grey 9)
I decided that I would add some green back in to make the eye pop! I used L07 (Natural Green) around the outer edges of the eyeshadow.
For the darkest shadows, I added some purple to create a strong colour. Here I used V09 (Violet).
I then used V17 (Bluish Lavender) on the waterline to add some purple shadows, but I made sure I left some pink in the middle.
For the eyelashes, I used CG08.
It's important to note that eyelashes are constantly changing direction. This means that on the left side, they flick out to the left, at the middle they are almost straight, and by the time they get to the right, they are leaning in the same direction.
I drew an example below. The red one shoes the lashes traveling in the same direction. But in the green one, they change direction and also overlap which adds to the realism.
I repeated the same on the top lashes. To get the clean flick you may have to turn your page so you can get a smooth fast flick off the page.
I decided to go all out and give my eye blue eyebrows. Because hey? I would if it suited me!
I used B37 (Indigo) and after doing a layer, I went back over it to get those shadows.
I then used my purple nail-polish glitter to add some sparkles!
This is a very effective way to add some excitement and you don't have to deal with the hassle of finding sparkles everywhere for the next 37 years!
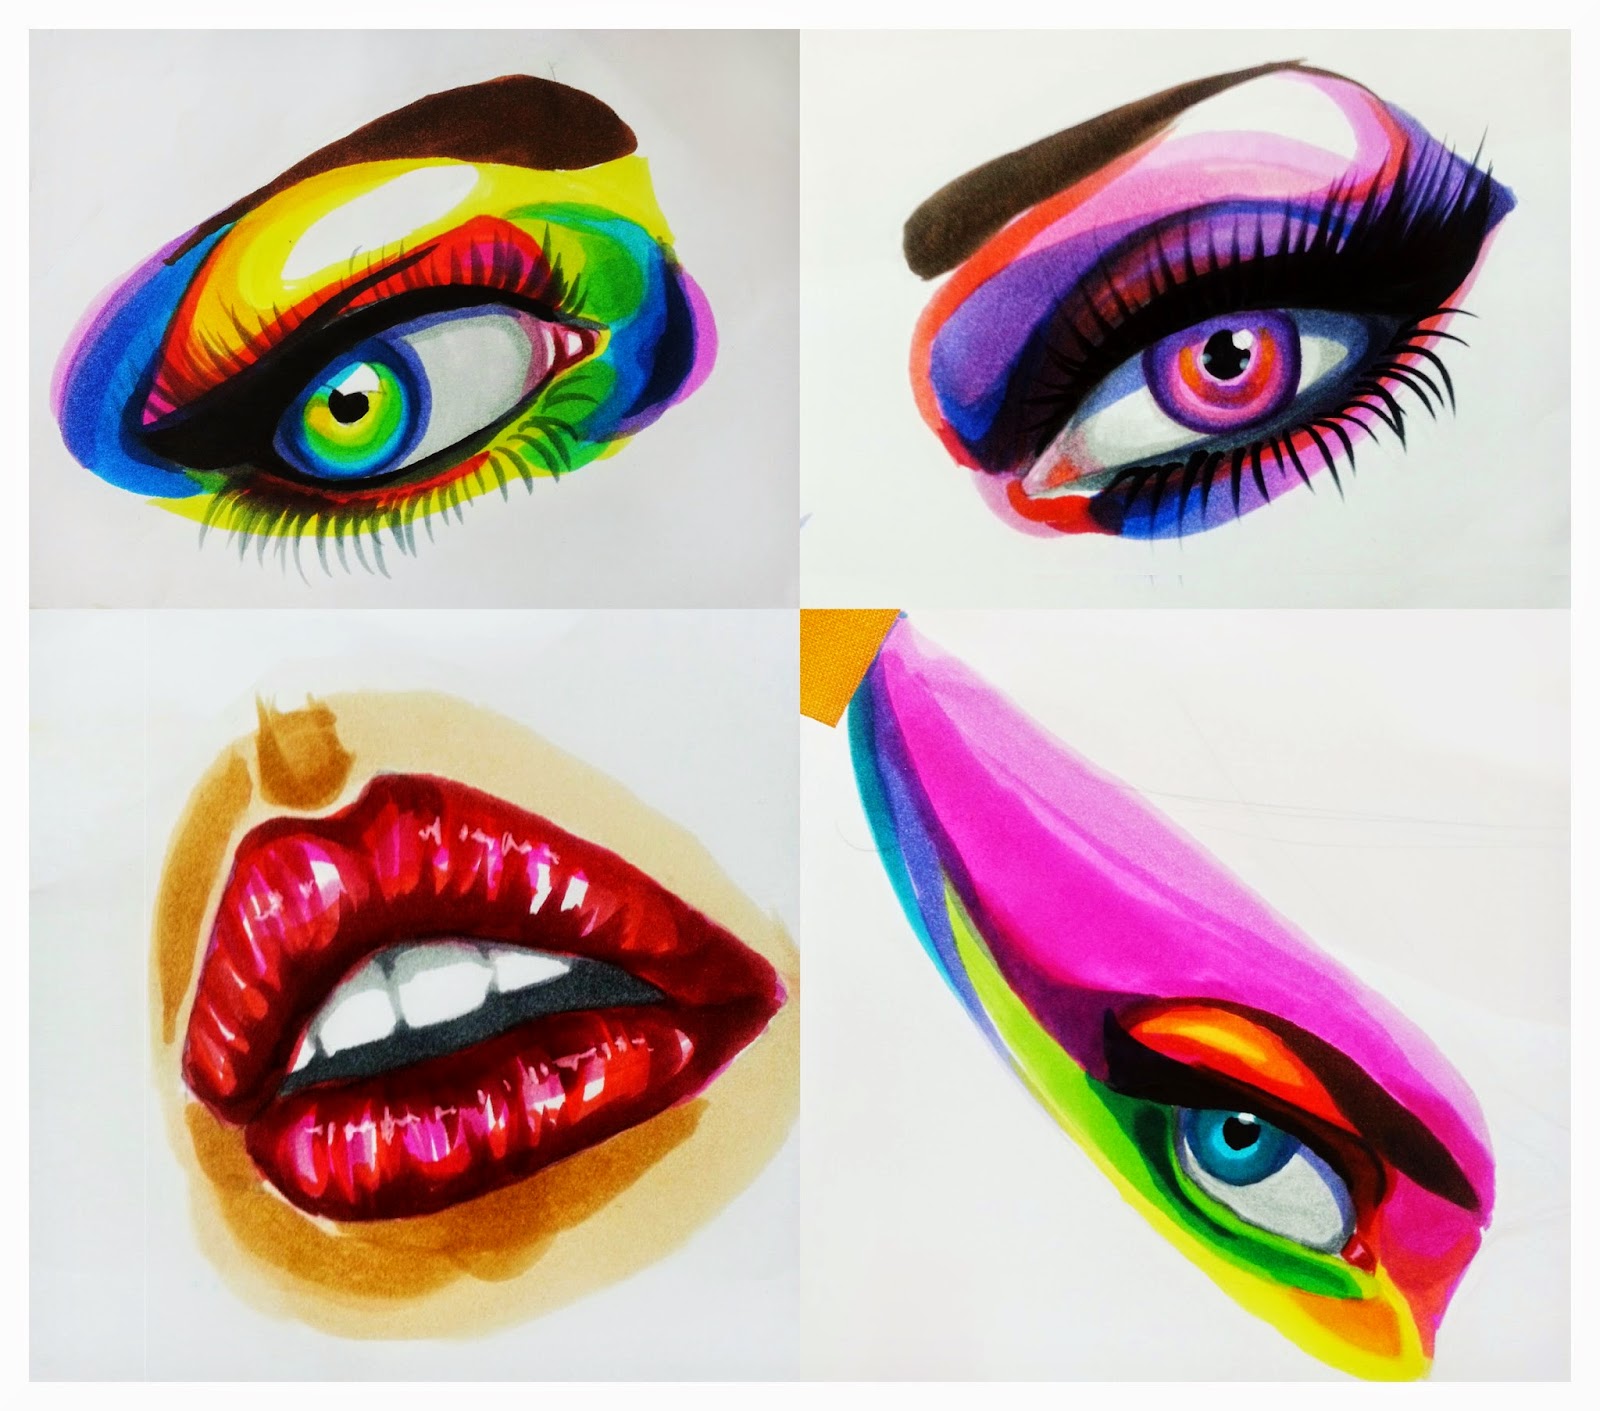
Here are some eyes and a pair of lips that I've drawn recently using the Mepxy Markers.
The markers dry really quickly and have such incredibly vibrant colours, everyone has a different approach to using them, but I find working with layering is most effective for me. :)
Hope you learnt something today!
Wanting to buy Markers?
VICTORIA
Senior Art Supplies Malvern
http://www.seniorart.com.au/
1310 Malvern Road, Malvern Vic, 3144
03-9804-3404
Senior Art Supplies Melbourne
http://www.seniorart.com.au/
21 Degraves Street, Melbourne Vic, 3000
03-9639-6662
Senior Art Supplies Frankston
http://www.seniorart.com.au/
7 Station Street, Frankston Vic, 3199
03-9783-6044
Deans Art Thornbury
Address 316 St Georges Road Thornbury VIC 3071.
T: (03) 9485 9500 F: (03) 9485 9595 E: thornbury@deansart.com.au
Deans Art Fitzroy
Address 188 Gertrude Street Fitzroy VIC 3065.
T: (03) 9419 6221 F: (03) 9419 3839
E: fitzroy@deansart.com.au
Deans Art Fitzroy Melbourne
Address 369-371 Lonsdale Street Melbourne VIC 3000.
T: (03) 9602 2184 F: (03) 9670 1147 E: melbourne@deansart.com.au
Hampton Art Supplies
427-455 Shop 14, Hampton Street, Hampton VIC 3188
Ph. 0395983077 Fax. 0395983501
www.
hamptonartsupplies.com.au
QUEENSLAND
University of Southern Queensland Bookshop (Toowoomba)
Level 1, R Block , University Of Southern Queensland
West St, Toowoomba QLD 4350
Phone:(07) 4631 2657
Art Shed Westend Brisbane
http://www.artshedbrisbane.com.au
274 Montague Road (corner of Scott Street) West End QLD 4101 Australia
Phone: (07) 38461330 Fax: (07) 3846 3330
westend@artshed.com.au
School Art Supplies
http://www.schoolartsupplies.com.au
Unit1B, 25 Michlin Street Moorooka QLD 4105 Australia
sales@schoolartsupplies.com.au
Phone: (07) 3848 6000
Urban Fiction Comic Book Store
http://urbanfiction.com.au/
35 Howard St. Nambour,
Queensland 4560Phone
0449 259 628Email
drew@urbanfiction.com.au
Blockas Art
Online Art Store-
http://www.blockasarts.com.au
Cotlew Street, AshmoreQueensland 4214Australia
steve@blockasarts.com.au
07 5539 6400
Discount Art Warehouse
34 Arthur Street, Fortitude Valley QLD 4006
Ph. 0733581968 w. www.
discountart.com.au
NEW SOUTH WALES
The Art Scene at West Ryde
912/914 Victoria Road, West Ryde NSW 2114
(02) 9807 2222
artbasics.com.au
The Art Scene On Campus PaddingtonCollege of Fine Arts, COFA Cnr Greens Road & Oxford Street, Paddington, NSWC Block (up Courtyard Steps)
0421 820 964
http://www.artscene.com.au/contact
Hunter Institute Bookshop
Block S, Newcastle Campus, TAFE NSW, Maitland Road, Tighes Hill NSW 2297
02 4923 7702
orders@hitbookshop.com.au
Tillys Art Supplies
Address: 661 Darling St, Rozelle NSW 2039
Phone:(02) 9810 8309
Basement Books
HENRY DEANE PLAZA
2, Shop 1 Lee Street, Haymarket NSW 2000
ph. 0292117726 w. www.
basementbooks.com.au
SOUTH AUSTRALIA
Art to Art
69 Glen Osmond Road, Eastwood SA 5063
Ph.(08)82718444 fax. (08)82718555
E eastwood@arttoart.net
www.arttoart.net
Art to Art West
727 Shop T122, Harbour Town, Tapleys Hill Rd, West Beach SA 5024
Ph.(08)83534261 E harbourtown@arttoart.net
www.arttoart.net
Clipboards Stationers and Art Supplies
163 Main South Rd, Morphett Vale SA 5162
ph: (08) 8186 1525 fax: (08) 8186 1526
Email clipbdsales@gmail.com
www.clipboard.com.au
Adelaide University Bookshop
Union Building, Gate 10, off Victoria Dr, Adelaide, SA, 5000
(08) 8125 5160
E adelaide@unibooks.com.au
Loxton Newsagency
12 East Terrace, Loxton SA 5333
(08) 8584 7750
TASMANIA
Birchalls Launceston
118-120 Brisbane Street, The Mall
Phone: (03) 63313011 Fax: (03) 63317165
Please send us your work or anything that you create! Thanks for watching!

 There are times when I really like working in details, but i also like working with the freedom that I don't know where the artwork will go and it will just evolve as it goes along. Sometimes I can also get a bit overwhelmed not know where to start or the idea for the whole thing, so i find that working in a bit of a grid system where I am just working on a box at a time can help AND sometimes despite it being a bit all over the place it can come together as a cute little artwork or just ideas for a another work. So if your a bit like me you might like to give this little grid work a try.
 Step 1 First thing you want to do is that you want to chose 1 colour. I chose the Schmincke Aero Colour - Cyan. I could chosen to do this with watercolours but I love with these inks how you can use them like watercolours as watered down or vibrant as you like and I feel that they move better than watercolours.
 Step 3: Masking off areas with the Masking fluid. One of the things I also love about this set is the masking pen. So i jumped straight in my chosing one section and masking some lines on it.
 I also just love love love the pen that comes with this set. For someone like me that likes fine detail being able to do my fine lines with the same coloured ink in filled into the pen is just such a delight, it saves me messing about with the super fine brushes I can just fill the pen and away I go. I can get a much better line (and dot ) with the pen that i would with the brush.
 From here it really is a matter of just filling everything up. It actually is quite time consuming. I had to come back to this a few times as I was getting too caught up in the details.


