

Believe it or not this is my first "play" with Pebeo Setacolor Fabric Paints. This just goes to show how easy it is to create something cool and customised. Here's how I did it...
- Grab a piece of calico or other firmly woven cotton fabric, wash it first to remove sizing (in detergent without fabric softener) and iron.
- I started with this stencil that I already had in my art supplies (sorry that it's old I can't tell you where I bought it or what it's called but you would be able to find something similar in your craft store).
 |
| I taped the stencil down with some removable masking tape to help keep it in place. |

- Next I mixed Pebeo Setacolor Opaque in Black with Pebeo Setacolor Thickener. This is to make the paint a very thick consistency so it doesn't spread on the fabric when applied or seep under the stencil. I experimented with just adding a small amount of thickener at a time and stirring until I was happy with the consistency.
- Use a stencil brush (mine are from Princeton) to dab on the stencil. Try to keep the brush vertical and dab in an up and down manner rather than brush. This will help stop your stencil from moving and give you a cleaner finish.
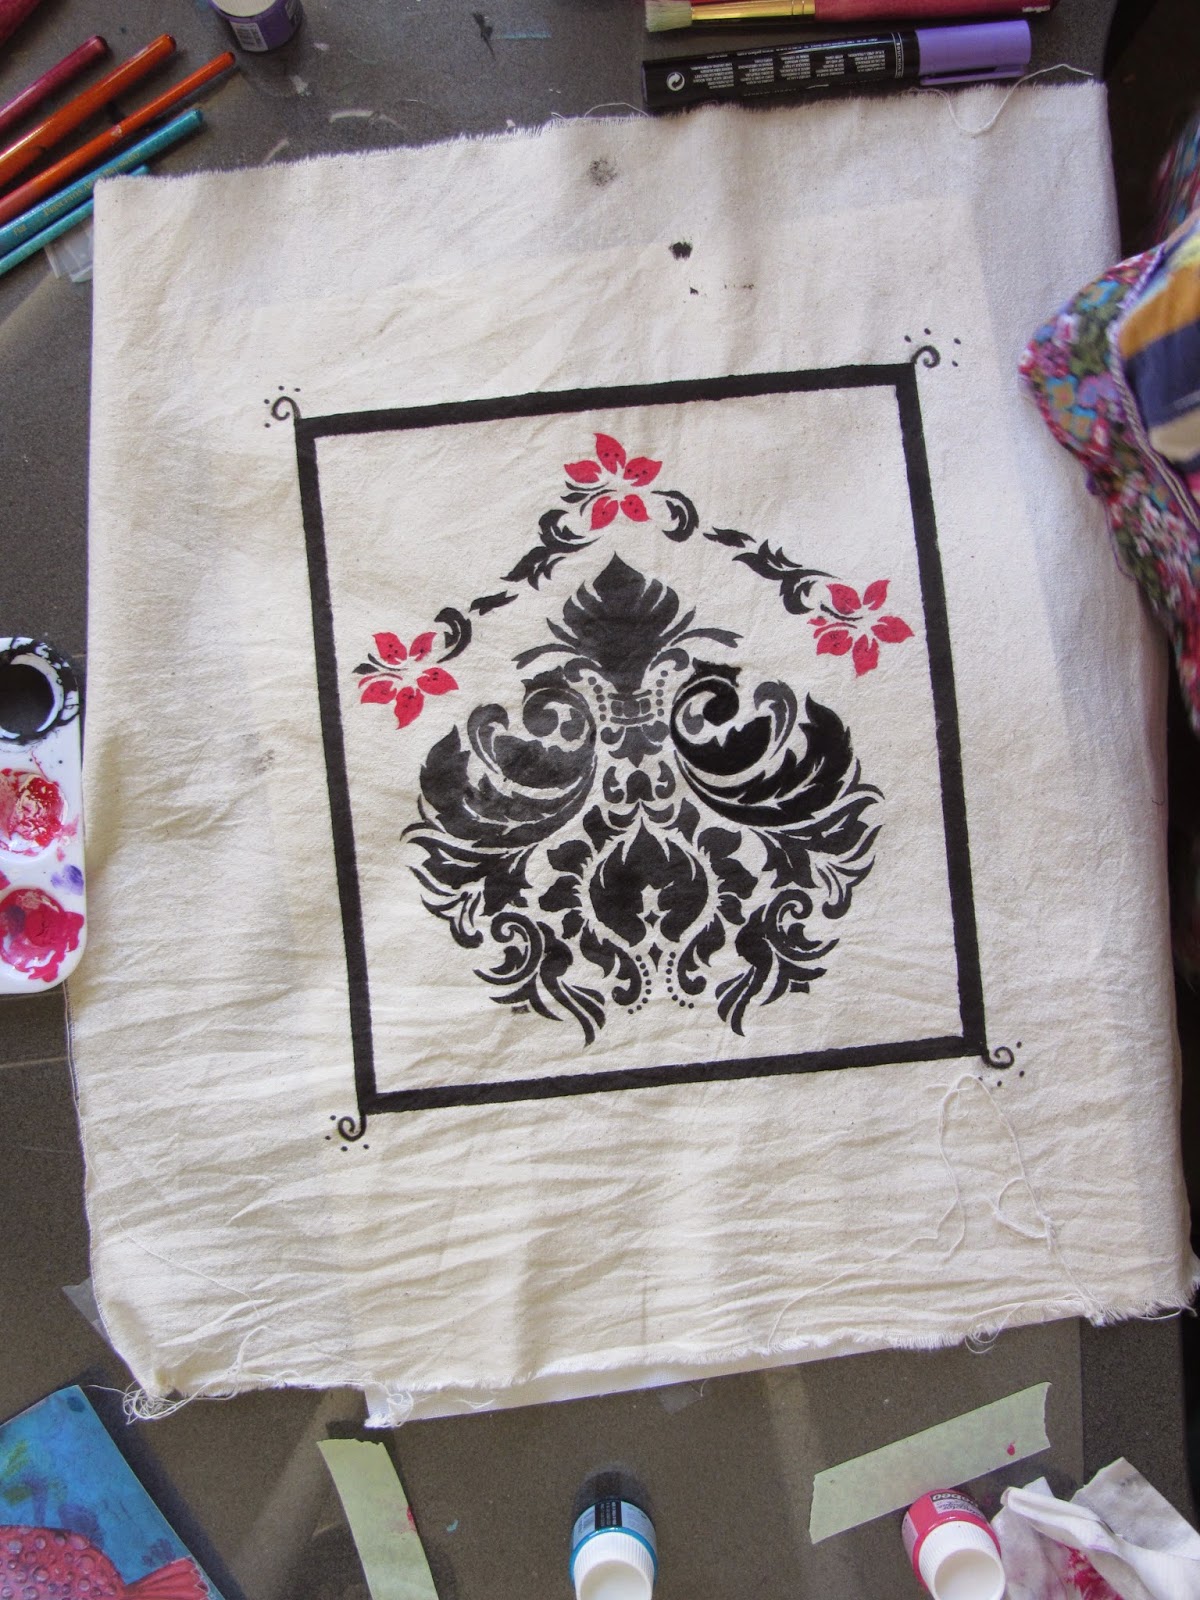
- I did mine all in one colour to keep it simple, except for three small flowers within the design that I painted in Pebeo Setacolour Opaque in Cherry Red. You may need to use a smaller stencil brush or other fine brush to get details depending on your choice of stencil.

- To create the border I placed strips of Scotch tape about 1cm away from the straight edges of the stencil and painted inbetween, carefully removing tape and being careful not to move the stencil.
Ok, at this point I want to tell you are few things NOT TO DO, and how you might be able to fix it if you do do it...
- DO NOT accidentally drop your paint brush on your fabric: You can see a black dot at the top of the fabric where I did this. I decided to cut right around the edge of my border and appliqué the picture onto another piece of fabric.
- DO NOT smudge the edge when lifting the tape: I did little designs in the corners to try and mask this, then since I cut right around the edge this problem was also eliminated.
- Make sure your paint has dried evenly before you lift the stencil: I think this was caused because I ran out of black paint and had to mix another batch, the second patch was thicker than the first. It was easily fixed by using a Black Pebeo SetaSkrib marker to carefully go over the black painted area. This also allowed me to fix any small stencilling errors, and better define the design.
- HOW A MISTAKE CAN SOMETIMES GIVE YOU A COOL UNEXPECTED DESIGN FEATURE: I purposely left some the lighter Black areas light, this gave my design a two-toned black effect which I really liked.
- I also added a little red SetaSkrib marker to the outside of my flowers for depth and added a few black dots with the Black marker.

One I got to this stage I began to see that I could actually turn my "play" into something useful.
- I decided this could be a great design for a simple Calico shopping tote, so I cut a piece of calico to size (mine is 30cm X 45cm finished size but it doesn't need to be exact)
- I used an double-sided iron-on adhesive web, "Heat n Bond Ultrahold" but there are plenty of different types available. Follow the instruction for your particular product, but basically you peel of one side, iron it onto your design, cut around the shape of your design, then peel of the backing and iron it onto the other piece of fabric.
- I stitched on a piece of trim that I had in my sewing box to the bottom edge of the bag, this is optional, or you could use any trim that looked nice with the colours and design of your stencil
 |
| Once you have decided where to place the trim, pin it onto your fabric while it can still be laid out flat, and secure your trim BEFORE stitching up side seams |
- To make simple straps cut two long strips of fabric (mine were 5cm wide and 65 cm long) Fold the fabric in half vertically and press. Leaving a seam of about .5cm stitch down the raw edges to make a tube. Use a Loop turning tool to turn your straps inside out and iron to press them flat.
- Next cut two strips of fabric the same width as your bag and about 5cm wide. This is to be a facing for the top of the bag so you can attach your straps. Finish the bottom edge your facing with a zig-zag stick, overlocker or other finishing method.
 |
| Stich in your straps before sewing up the side seams |
- Layer the top edge of your bag (right side up), place the strap its desired position (mine were about 6m from each edge), and the facing (wrong side up) and stitch through all layers. Repeat with both the front and back side of your bag)
- Turn the facing to wrong side, edge stitch on top of the facing, at the edge of the seam, through the seam thickness.
 |
| Edge stitched will help the facing lay neat and flat |
- Sew up your side seams, finish the edges, then turn your facing in and press.

And there you go, one variation of a simple tote bag that you can make with basic sewing skills and Pebeo Setacolour Fabric Paints. The possibilities for what you can create are endless.

Love it.
ReplyDeleteIt's gorgeous! And thanks for all the useful tips!
ReplyDeleteThis is wonderful!
ReplyDelete